To remove a bathroom drain, first unscrew the drain cover using a screwdriver. Then, twist and lift the drain assembly out of the sink or tub.
Removing a bathroom drain can seem daunting, but with the right tools and approach, it’s manageable. Homeowners often face clogs or maintenance needs that require drain removal. Knowing how to do this safely and effectively can save time and money.
Common issues include hair buildup or debris, which can lead to slow drainage. A simple removal allows for thorough cleaning and inspection of the plumbing. This guide will walk you through the steps needed to successfully remove your bathroom drain, ensuring a smoother plumbing experience in the future. With a few tools and some patience, you can tackle this task confidently.

Credit: diy.stackexchange.com
Introduction To Bathroom Drain Removal
Removing a bathroom drain can seem daunting. Yet, it is often necessary for repairs or cleaning. Understanding the process simplifies the task. This guide helps you navigate bathroom drain removal easily.
Why It’s Necessary
Drain removal is important for several reasons:
- Clogs: Hair and soap can build up over time.
- Repairs: Broken drains need removal for proper fixing.
- Cleaning: Deep cleaning prevents future issues.
- Replacement: Old drains may require complete replacement.
Tools You’ll Need
Gathering the right tools makes the job easier. Here’s a list of essential tools:
| Tool | Purpose |
|---|---|
| Adjustable Wrench | To loosen and tighten nuts. |
| Screwdriver | To remove screws from the drain. |
| Pliers | For gripping and pulling parts. |
| Bucket | To catch water and debris. |
| Gloves | To keep hands clean and safe. |
Having these tools ready saves time and effort. Be prepared before starting the drain removal process.
Credit: www.homedepot.com
Safety First: Preparing To Work
Working on your bathroom drain can be simple. Safety must come first. Proper preparation helps avoid accidents. Follow these steps to ensure a safe experience.
Turning Off The Water
Before starting, always turn off the water supply. This prevents any unexpected spills or flooding. Follow these simple steps:
- Locate the water shut-off valve under the sink.
- Turn the valve clockwise to close it.
- Open the faucet to drain any remaining water.
Confirm the water is completely off. Check for leaks or drips. This helps keep your workspace dry.
Protecting Your Surfaces
Prevent damage to your bathroom surfaces. Use protective materials to cover the area. Here are some options:
- Old towels or rags
- Plastic sheeting
- Cardboard pieces
Place these items around the sink. This avoids scratches or stains. Clean up spills immediately. A tidy workspace keeps you safe.
By taking these safety measures, you can work confidently. Stay focused and keep your area organized. Safety leads to successful repairs.
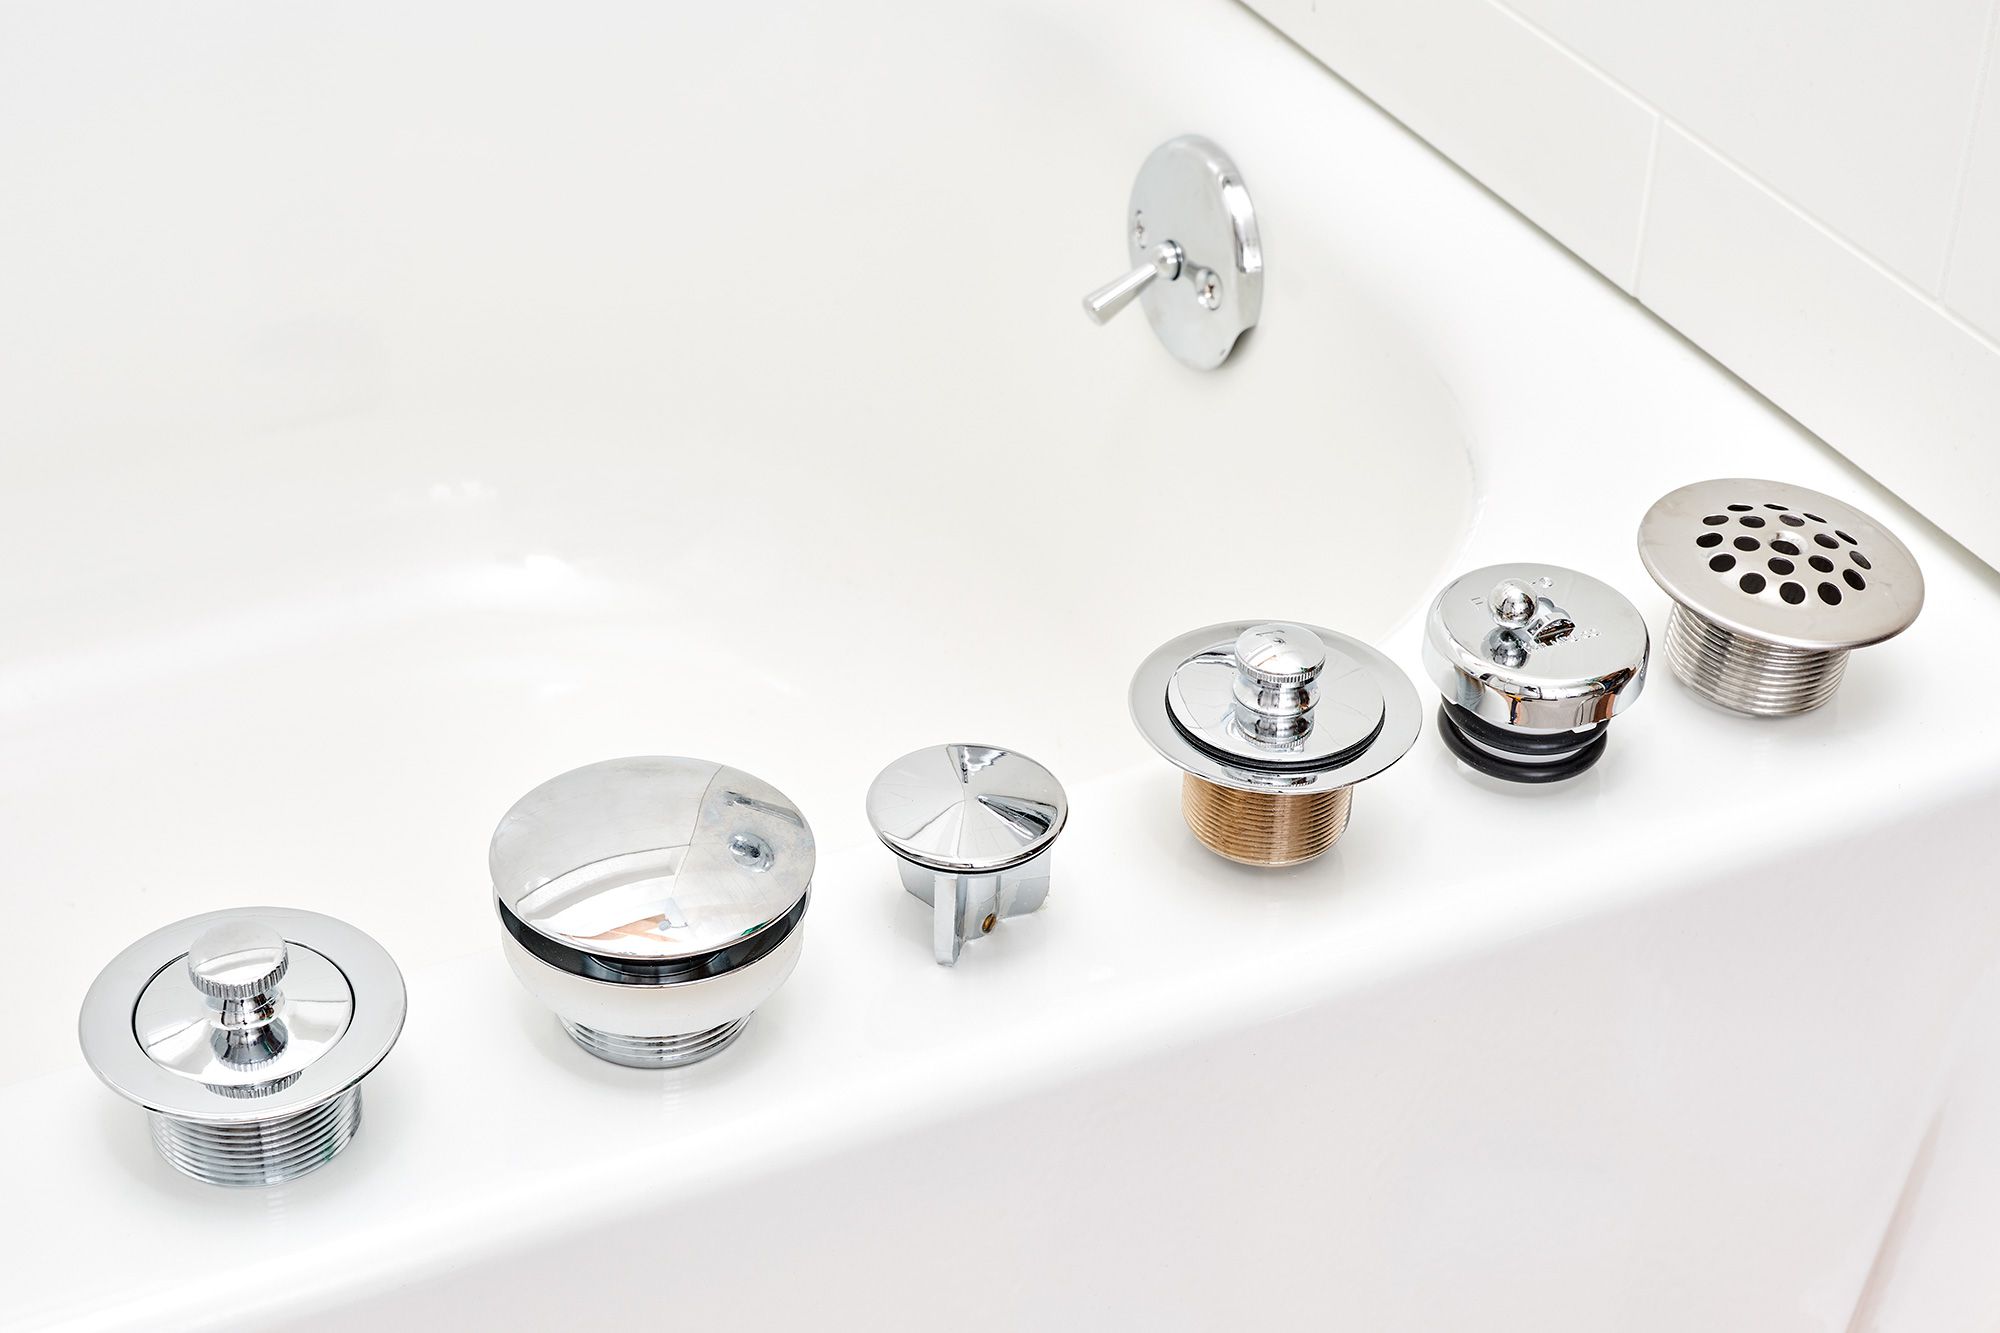
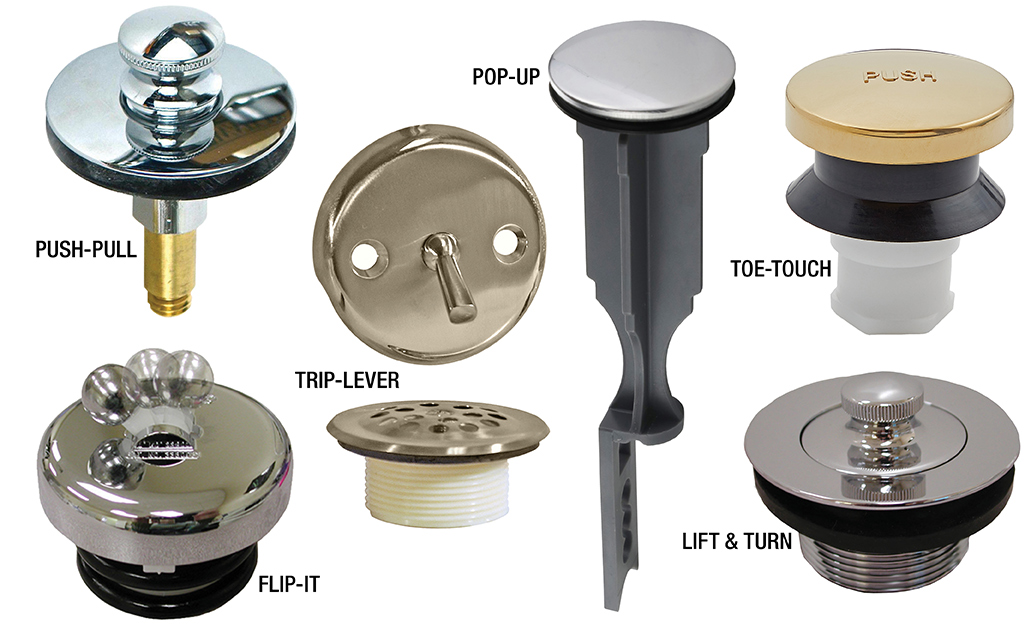
Identifying Your Drain Type
Understanding your bathroom drain type is essential. Different types require different removal methods. Knowing your drain type saves time and effort. Let’s explore the two most common types: Pop-Up Drains and Plunger Drains.
Pop-up Drains
Pop-up drains are common in sinks and bathtubs. They feature a lever or knob that opens and closes the drain. Here’s how to identify a pop-up drain:
- Look for a lever near the faucet.
- Check for a knob at the back of the sink.
- Observe if the drain opens and closes by lifting.
To remove a pop-up drain:
- Turn off the water supply.
- Unscrew the retaining nut under the sink.
- Pull out the pop-up assembly.
Plunger Drains
Plunger drains are often found in older sinks. They use a simple plunger mechanism to open and close. Here’s how to identify a plunger drain:
- Look for a plunger rod connected to the drain.
- Check for a lift rod on the back of the faucet.
- Observe if the drain opens by pushing the rod.
To remove a plunger drain:
- Turn off the water supply.
- Disconnect the lift rod from the drain.
- Unscrew the retaining nut below the sink.
- Remove the entire drain assembly.
Identifying your drain type makes the removal process smooth. Follow these simple steps for an effective drain removal.
Step-by-step Guide: Removing A Pop-up Drain
Removing a pop-up drain can seem tricky. Follow this guide for a smooth process. You will need basic tools and a little patience. Let’s break it down into simple steps.
Loosening The Nut
Start by gathering your tools. You will need:
- Adjustable wrench
- Bucket
- Gloves
- Flashlight
Next, follow these steps:
- Turn off the water supply.
- Place the bucket under the sink. This will catch any water.
- Locate the nut under the sink. It connects the drain to the plumbing.
- Use the adjustable wrench to loosen the nut. Turn it counterclockwise.
Be careful not to apply too much force. You don’t want to damage the pipes.
Removing The Drain
Once the nut is loose, it’s time to remove the drain:
- Gently pull the drain out from the sink.
- Check for any remaining debris. Clean it out if needed.
- Inspect the rubber gasket. Replace it if it looks worn.
Now, your pop-up drain is removed. You can replace it or clean it as needed.
Step-by-step Guide: Removing A Plunger Drain
Removing a plunger drain can seem tricky. This guide simplifies the process. Follow these steps to remove your plunger drain easily.
Accessing The Plunger Mechanism
Start by locating the drain cover. Use a screwdriver to remove the screws. Set the cover aside. Now, find the plunger mechanism, usually connected to the drain.
- Look for the lift rod near the faucet.
- Identify the horizontal pivot rod connected to the plunger.
- Check for any clips holding the mechanism in place.
Carefully detach any clips or screws. This step is crucial for easy access. Ensure you have a towel ready for any water spills.
Detaching The Plunger
Now it’s time to detach the plunger. Follow these steps:
- Unscrew the pivot rod from the drain body.
- Lift the plunger straight up to remove it.
- Check for any debris stuck to the plunger.
Clean the plunger before reassembling. This will help prevent clogs in the future. After cleaning, replace the plunger by reversing the steps.
| Step | Action |
|---|---|
| 1 | Unscrew the pivot rod |
| 2 | Lift the plunger out |
| 3 | Clean the plunger |
Follow these steps carefully. You’ll have your plunger drain removed in no time.
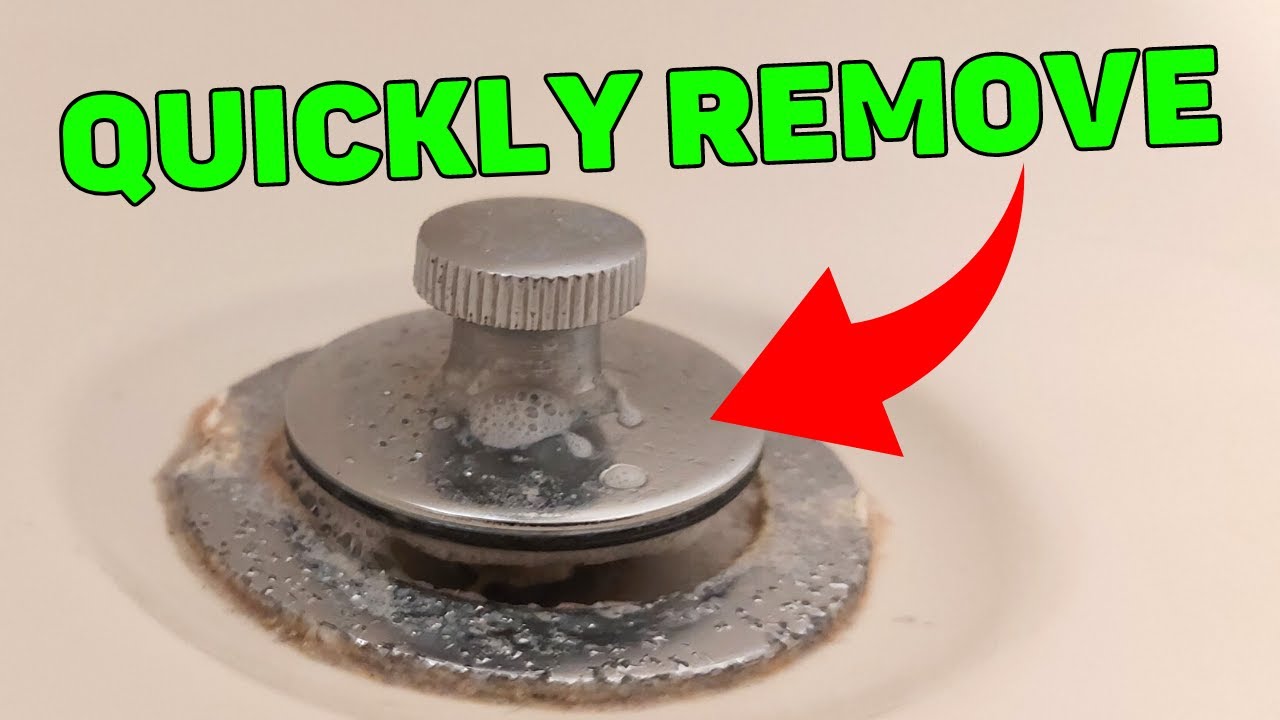
Credit: m.youtube.com
Cleaning And Maintenance Tips
Regular cleaning and maintenance keep your bathroom drain in top shape. Follow these simple steps to ensure smooth drainage. Maintain your drain to avoid unpleasant clogs and odors.
Clearing Debris
Debris often blocks bathroom drains. Clear it regularly to prevent buildup. Here’s how:
- Remove the drain cover. Use a screwdriver if necessary.
- Use gloves to protect your hands.
- Carefully pull out hair, soap scum, and other debris.
- Flush the drain with hot water. This helps dissolve leftover residue.
Perform this task monthly for best results. A clean drain works effectively and lasts longer.
Inspecting For Damage
Check your drain for any signs of damage. Cracks or leaks can lead to bigger issues. Follow these steps:
- Look for cracks in the drain cover.
- Check the pipes for rust or corrosion.
- Inspect seals around the drain for leaks.
Use a flashlight for better visibility. If you find damage, consider replacing the affected parts. Timely repairs prevent costly plumbing problems.
Reinstallation Or Replacement
Deciding between reinstallation and replacement of your bathroom drain is crucial. A good drain ensures proper water flow. If your drain is damaged or outdated, consider replacing it. If it’s simply clogged or dirty, reinstallation may suffice.
Choosing A New Drain
Selecting the right drain can make a big difference. Here are some key points to consider:
- Material: Stainless steel, plastic, or brass.
- Size: Match the size to your existing plumbing.
- Style: Choose a design that fits your bathroom decor.
- Function: Consider if it has a strainer or stopper.
Here’s a simple table for quick reference:
| Material | Durability | Cost |
|---|---|---|
| Stainless Steel | High | Medium |
| Plastic | Medium | Low |
| Brass | Very High | High |
Installation Process
Follow these steps for proper installation:
- Gather Tools: You will need a wrench, pliers, and sealant.
- Remove Old Drain: Unscrew it carefully. Clean the area.
- Prepare New Drain: Apply sealant to the threads.
- Install New Drain: Screw it into place. Ensure it is tight.
- Test for Leaks: Run water to check for any leaks.
Ensure each step is done carefully. A well-installed drain prevents future issues.
Troubleshooting Common Problems
Removing a bathroom drain can lead to several issues. Knowing how to troubleshoot these problems can save time and effort. Here are common issues you might face.
Leakage Issues
Leakage can occur for various reasons. Here are some common causes:
- Loose connections
- Worn-out washers
- Cracked pipes
To fix leakage issues:
- Check all connections. Tighten any loose parts.
- Inspect washers. Replace if they show signs of wear.
- Examine pipes for cracks. Repair or replace damaged sections.
Use plumber’s tape to secure connections. This tape helps prevent future leaks.
Stuck Components
Sometimes, parts can become stuck. This makes removal difficult. Common reasons include:
- Corrosion
- Debris buildup
- Improper installation
To resolve stuck components:
- Apply a penetrating oil. Let it sit for a few minutes.
- Gently tap around the stuck area. Use a rubber mallet.
- Try using pliers. Grip and turn carefully.
Always use caution. Excessive force can cause damage. If stuck parts remain, consult a professional plumber.
Frequently Asked Questions
How Do You Remove A Bathroom Water Drain?
To remove a bathroom water drain, first turn off the water supply. Unscrew the drain cover using a screwdriver. Use a drain wrench to loosen the drain body, then pull it out. Clean the area before installing a new drain.
Always wear gloves for safety during the process.
How Do You Remove Bathroom Drainage?
To remove bathroom drainage, first, turn off the water supply. Use a wrench to disconnect the drain pipes. Clean the area and check for clogs. Replace any damaged parts before reassembling. Finally, reconnect the pipes and turn the water supply back on to test for leaks.
How Do You Unscrew A Bath Drain?
To unscrew a bath drain, use a drain wrench or pliers. Grip the drain tightly and turn counterclockwise. If it’s stuck, apply penetrating oil and wait a few minutes. Clean the area before reinstallation to prevent future issues.
How Do You Remove A Bathroom Sink Drain Block?
To remove a bathroom sink drain block, first, use a plunger to create suction. If that fails, try a plumber’s snake to dislodge the blockage. For stubborn clogs, mix baking soda and vinegar, then flush with hot water. Always wear gloves for safety during the process.
Conclusion
Removing a bathroom drain can seem daunting, but it’s manageable with the right approach. Follow the steps outlined in this guide to tackle the task efficiently. Remember to gather your tools beforehand. With a little patience, you’ll have your drain removed and ready for maintenance or replacement in no time.