To replace a bathroom drain stopper, first remove the old stopper by unscrewing it or pulling it out. Then, install the new stopper by following the manufacturer’s instructions.
Bathroom drain stoppers are essential for preventing water from draining too quickly. Over time, they can wear out, leading to leaks or reduced functionality. Replacing a faulty stopper is a straightforward task that can save you time and money on plumbing repairs.
Whether you have a lift-and-turn, pop-up, or push-and-pull type, understanding the replacement process is crucial. This guide will walk you through the steps to ensure your bathroom remains functional and stylish. A well-installed drain stopper can enhance your bathroom’s efficiency and aesthetics, making it a key component of your home plumbing.
Introduction To Bathroom Drain Stopper Issues
Bathroom drain stoppers play a key role in your plumbing. They help control water flow and prevent clogs. Over time, these fixtures can face various problems. Understanding these issues ensures proper maintenance and timely replacements.
Common Problems
- Clogs: Hair, soap, and debris accumulate easily.
- Leakage: Water can leak around the stopper.
- Rust: Metal stoppers may corrode over time.
- Jamming: Stoppers can get stuck in the closed position.
- Improper Fit: A stopper that doesn’t fit correctly can cause issues.
Signs It’s Time For A Replacement
- Water Drainage Issues: Slow or poor drainage is a clear sign.
- Visible Damage: Cracks or breaks indicate a need for replacement.
- Frequent Repairs: Constant fixes may not be worth the effort.
- Water Stains: Stains around the drain suggest leaks.
- Unpleasant Odors: Foul smells can signal trapped debris.
| Problem | Solution |
|---|---|
| Clogs | Use a drain snake or plunger. |
| Leakage | Replace the stopper or seal. |
| Rust | Consider a plastic or new metal stopper. |
| Jamming | Lubricate or replace the mechanism. |
| Improper Fit | Choose the right size stopper. |

Credit: www.amazon.com
Types Of Bathroom Drain Stoppers
Choosing the right bathroom drain stopper is essential for proper function. Different types serve various needs and preferences. Here’s a breakdown of the most common types.
Push-pull
The push-pull stopper is simple to use. It operates by pushing down to close and pulling up to open. This type is often found in older bathtubs.
- Easy to install
- Durable materials
- Basic design
Lift-turn
The lift-turn stopper features a knob on top. Lift the knob to open the drain and turn it to close. This design offers a smooth operation.
- Stylish appearance
- Good for modern bathrooms
- Reliable sealing
Pop-up
Many sinks use the pop-up stopper. This type has a lever that lifts the stopper. It’s often found in vessel sinks.
- Convenient lever action
- Easy to clean
- Versatile design
Plunger Style
The plunger style stopper is common in some tubs and sinks. It uses a plunger mechanism to seal the drain. This type is effective for quick sealing.
- Simple mechanism
- Effective for water retention
- Easy to replace
| Type | Operation | Pros |
|---|---|---|
| Push-Pull | Push down to close | Easy to install, durable |
| Lift-Turn | Lift to open, turn to close | Stylish, smooth operation |
| Pop-Up | Lever lifts stopper | Convenient, easy to clean |
| Plunger Style | Plunger seals drain | Quick sealing, simple mechanism |
Tools And Materials Needed
Replacing a bathroom drain stopper requires the right tools and materials. Using the correct items makes the process smooth and easy. Here’s what you need to gather before you start.
Basic Toolkit
- Screwdriver: A flathead or Phillips screwdriver.
- Pliers: To grip and turn small parts.
- Wrench: For loosening nuts and bolts.
- Bucket: To catch any water that may spill.
- Towels: For cleaning up after the job.
- Gloves: To keep your hands clean.
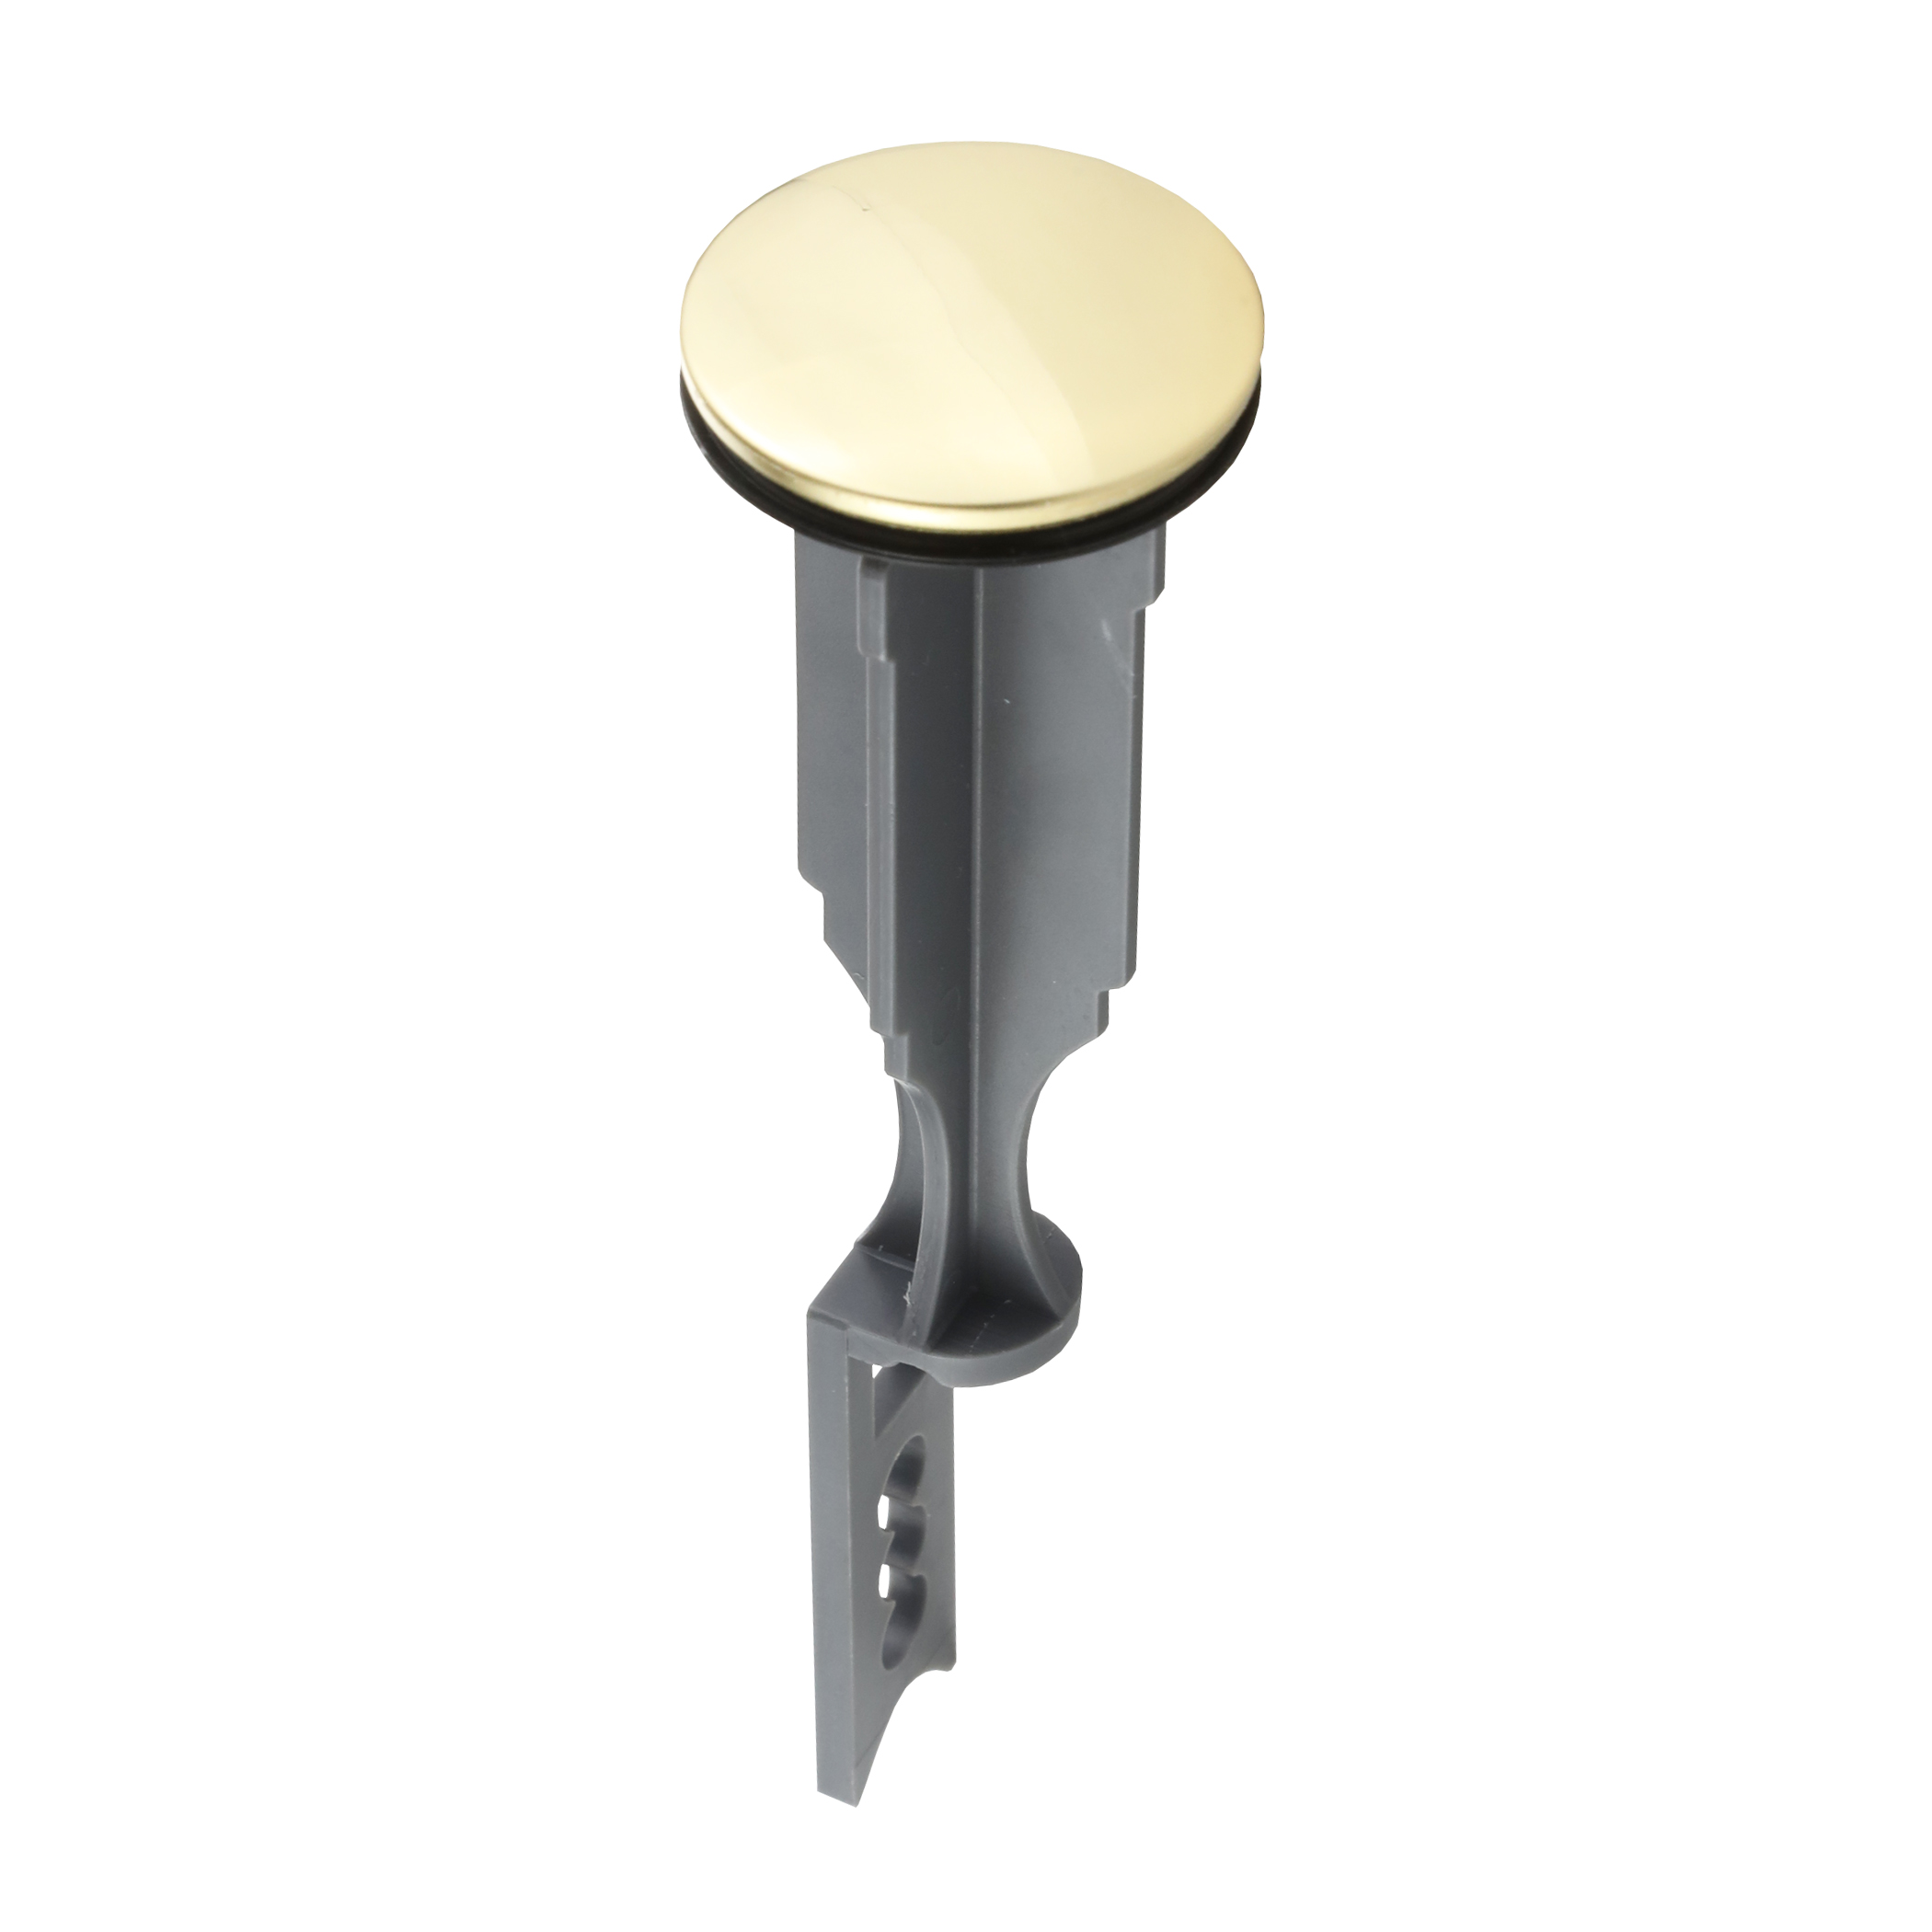
Replacement Stopper Selection
Choosing the right drain stopper is crucial. Here are some key points to consider:
| Type | Description | Ideal Use |
|---|---|---|
| Pop-up | Operated by a lever or knob. | Most common for bathroom sinks. |
| Lift-and-turn | Twist to open or close. | Simple design, easy to use. |
| Toe-touch | Press to open or close. | Convenient for quick access. |
| Flat stopper | Simple, flat design. | Used in bathtubs. |
Ensure the size matches your sink or tub. Check the material for durability. Popular options include rubber and metal. The right choice enhances functionality and style.

Credit: www.youtube.com
Removing The Old Drain Stopper
Removing the old drain stopper is essential for a smooth replacement. This process allows you to upgrade or fix your bathroom sink. Follow the steps carefully to avoid damage.
Step-by-step Guide
- Gather Tools: You need a screwdriver, pliers, and a bucket.
- Clear the Area: Remove any items from around the sink.
- Turn Off Water: Shut off the water supply to the sink.
- Place Bucket: Put a bucket under the sink to catch water.
- Remove the Stopper:
- Locate the stopper mechanism.
- Unscrew or unclip it gently.
- Check for Debris: Clean around the drain area.
- Inspect the Old Stopper: Look for any damage or wear.
Safety Tips
- Wear Gloves: Protect your hands from sharp edges.
- Use Safety Glasses: Prevent eye injuries from falling debris.
- Check for Sharp Objects: Look for broken glass or metal.
- Keep Children Away: Ensure kids are not near the work area.
- Have a First Aid Kit: Be prepared for minor injuries.
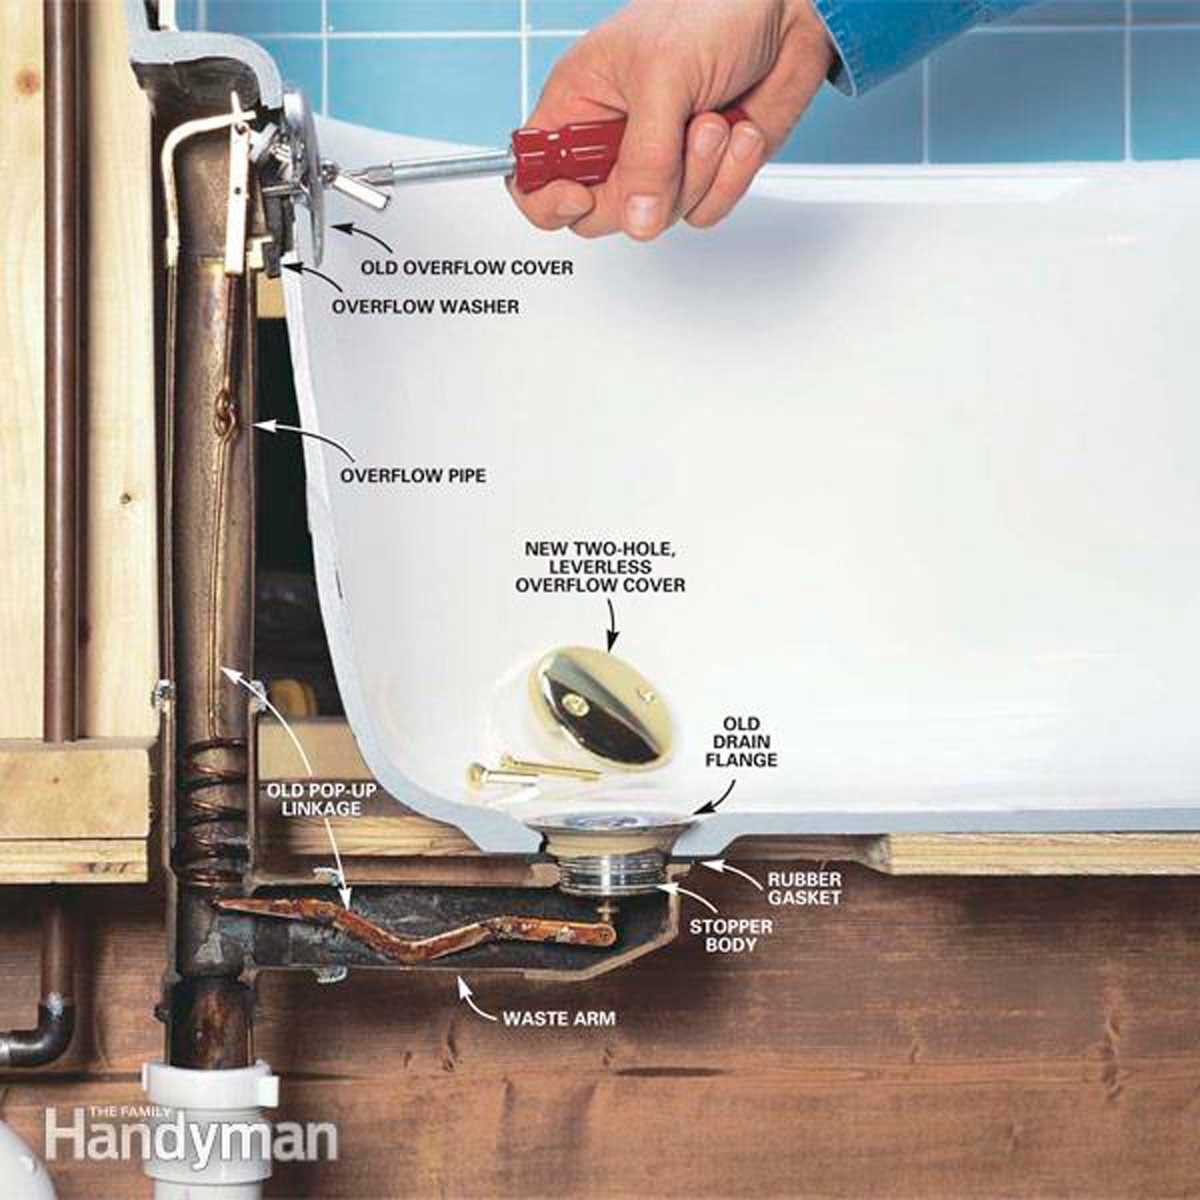
Installing The New Drain Stopper
Replacing a drain stopper is an easy task. It keeps water in your sink. Follow these steps for a smooth installation.
Preparation
Before starting, gather your tools and materials. You will need:
- New drain stopper
- Adjustable wrench
- Screwdriver
- Plumber’s putty
- Bucket
Clear the area under your sink. This makes it easier to work. Place a bucket under the drain to catch any water.
Installation Process
Follow these steps for installation:
- Remove the old drain stopper. Use a wrench or screwdriver.
- Clean the drain opening. Remove any old putty or debris.
- Apply plumber’s putty around the new stopper. Use enough for a good seal.
- Insert the new stopper into the drain. Press down firmly.
- Secure the stopper with screws. Make sure it is tight.
- Test the stopper. Run water to check for leaks.
Enjoy your new drain stopper. It should work perfectly!
Troubleshooting Common Issues
Bathroom drain stoppers may cause problems over time. Knowing how to fix these issues can save time and money. Below are common problems with bathroom drain stoppers.
Leaks
Leaks can occur with drain stoppers. They often happen due to:
- Worn-out seals
- Loose connections
- Cracked components
To fix leaks, follow these steps:
- Inspect seals for wear.
- Tighten any loose connections.
- Replace cracked parts immediately.
Use plumber’s tape for better sealing. This helps prevent future leaks.
Stuck Stoppers
A stuck stopper can be frustrating. Common reasons include:
- Debris buildup
- Rust or corrosion
- Poor installation
To unstick a stopper:
- Remove any visible debris.
- Apply lubricant around the mechanism.
- Gently wiggle the stopper until it moves.
Regular cleaning can help avoid this issue. Ensure proper installation to prevent sticking.
Improper Fit
Improper fit can lead to leaks and functionality issues. Check for:
- Wrong size stopper
- Incorrect installation angle
- Damaged components
To ensure a proper fit:
- Measure the drain before buying a stopper.
- Follow installation instructions carefully.
- Replace damaged parts promptly.
A well-fitted stopper prevents many issues. Regular checks can help maintain function.
Maintenance Tips For Longevity
Proper maintenance extends the life of your bathroom drain stopper. Regular care prevents issues and keeps your bathroom functional. Here are essential tips to ensure your stopper lasts longer.
Regular Cleaning
Cleaning the drain stopper is simple. Use these steps:
- Remove the stopper: Unscrew or pull it out gently.
- Clean with soap: Use warm, soapy water to scrub.
- Rinse: Ensure all soap residues are gone.
- Dry: Wipe it with a clean cloth before reattaching.
Regular cleaning prevents buildup of grime and hair. Aim for a cleaning session once a month.
Avoiding Clogs
Preventing clogs saves time and money. Follow these tips:
- Use a hair catcher: This stops hair from entering the drain.
- Limit soap usage: Too much soap can create residue.
- Don’t flush foreign objects: Items like wipes and cotton balls block drains.
These habits help keep your drain clear and functional.
Periodic Checks
Regular inspections help identify issues early. Check these components:
| Component | What to Look For |
|---|---|
| Stopper mechanism | Ensure it opens and closes smoothly. |
| Seals | Look for cracks or damage. |
| Drain pipe | Check for leaks or corrosion. |
Perform checks every few months. This helps spot issues before they worsen.
When To Call A Professional
Knowing when to call a professional for your bathroom drain stopper replacement is crucial. Some issues are simple. Others require expert help. Identifying these situations can save time and money.
Complex Problems
Some problems go beyond a simple replacement. These include:
- Severe Clogs: If the drain is clogged often.
- Old Plumbing: Aging pipes may need more than a stopper.
- Water Damage: Signs of leaks around the sink or tub.
- Multiple Drains: Issues affecting more than one drain.
These signs indicate a deeper issue. Professionals have tools to address complex problems effectively.
When Diy Isn’t Enough
Many homeowners prefer to handle repairs themselves. Yet, some situations require expert intervention:
- Time Constraints: Busy schedules can limit DIY efforts.
- Safety Concerns: Handling plumbing can be risky.
- Lack of Tools: Professionals have specialized equipment.
- Uncertainty: Not sure about the problem? Call an expert.
Recognizing your limits is key. When DIY efforts fail, professionals can save the day.
Credit: www.familyhandyman.com
Frequently Asked Questions
Can You Just Replace A Stopper In A Bathroom Sink?
Yes, you can replace a stopper in a bathroom sink. First, remove the old stopper and clean the area. Then, install the new stopper according to the manufacturer’s instructions. Ensure a proper fit to prevent leaks and ensure smooth operation.
Regular maintenance can prolong the stopper’s lifespan.
Are All Drain Stoppers The Same Size?
Not all drain stoppers are the same size. They vary based on the type of sink, tub, or shower. Always measure your drain opening to ensure a proper fit. Choosing the right size prevents leaks and ensures effective drainage.
What Are The Different Types Of Bathroom Sink Stoppers?
Bathroom sink stoppers include pop-up, lift-and-turn, push-and-pull, and basket strainers. Each type operates differently, providing various methods for sealing the drain. Choose one based on your sink design and personal preference for ease of use and functionality.
Why Won’t My Pop-up Plug Stay Down?
A pop-up plug may not stay down due to debris blocking the mechanism. Check for any buildup around the plug. A damaged seal or faulty spring can also cause this issue. Ensure the plug is properly aligned and tightened. Regular maintenance helps prevent this problem.
Conclusion
Replacing your bathroom drain stopper is a simple yet effective home improvement task. It can prevent clogs and improve drainage. Choosing the right stopper enhances functionality and style. Regular maintenance ensures longevity. With these tips, you can easily tackle this project and enjoy a more efficient bathroom.
Happy DIYing!