To clean a bathroom fan, first turn off the power. Remove the cover and use a vacuum or damp cloth to clean the blades and housing.
Keeping your bathroom fan clean is essential for maintaining good air quality and preventing mold growth. Dust and debris can accumulate quickly, reducing the fan’s efficiency. A clean fan helps improve ventilation, keeping your bathroom fresh and dry. Regular maintenance can also extend the life of your fan, saving you money on replacements.
This simple task requires minimal tools and can be done in just a few minutes. Follow a few easy steps to ensure your bathroom fan operates effectively, contributing to a healthier home environment. Let’s explore how to tackle this cleaning task effectively.
Credit: www.familyhandyman.com
Introduction To Bathroom Fan Cleaning
Cleaning your bathroom fan is essential for a healthy home. Dust and grime can build up over time. This can cause the fan to work inefficiently. Regular cleaning keeps the air fresh and circulation strong.
Why Clean Your Bathroom Fan
Keeping your bathroom fan clean offers several benefits:
- Improved Air Quality: Reduces dust and allergens.
- Energy Efficiency: A clean fan uses less energy.
- Extended Lifespan: Regular maintenance helps the fan last longer.
- Odor Control: Removes musty smells effectively.
Signs Your Fan Needs Cleaning
Watch for these signs that indicate your fan needs cleaning:
- Dust accumulation on the fan cover.
- Strange noises while the fan operates.
- Decreased airflow from the fan.
- Visible mold or mildew around the fan.
Addressing these signs promptly can improve your bathroom’s atmosphere.
Safety First
Cleaning your bathroom fan is important for air quality. However, safety should always come first. Follow these steps to ensure a safe cleaning process.
Turning Off Power
Before starting any cleaning, turn off the power to your bathroom fan. This prevents accidents and injuries. Here’s how to do it:
- Locate your home’s main electrical panel.
- Find the circuit breaker for the bathroom.
- Switch the breaker to the “off” position.
Double-check by trying to turn on the fan. It should not operate.
Safety Gear Recommendations
Wearing the right safety gear is crucial. Use these items while cleaning:
- Safety goggles: Protect your eyes from dust and debris.
- Gloves: Keep your hands safe from sharp edges.
- Dust mask: Avoid inhaling dust particles.
Here’s a quick table of recommended gear:
| Gear | Purpose |
|---|---|
| Safety goggles | Protect eyes from dust |
| Gloves | Shield hands from sharp edges |
| Dust mask | Prevent inhalation of particles |
By following these safety steps, you ensure a smooth cleaning process. Stay safe while maintaining your bathroom fan!
Gathering Your Cleaning Supplies
Cleaning your bathroom fan is easier with the right supplies. Start by collecting everything you need. This will make the process quick and effective. Let’s break down the essential tools and materials.
Essential Tools And Materials
- Screwdriver – Needed to remove the fan cover.
- Vacuum cleaner – To remove dust and debris.
- Microfiber cloths – For wiping surfaces clean.
- Bucket – To hold cleaning solutions.
- Gloves – Protect your hands during cleaning.
Diy Cleaning Solutions
Homemade cleaners are safe and effective. Here are some simple recipes:
| Solution | Ingredients | Use |
|---|---|---|
| Vinegar Solution | 1 part vinegar, 1 part water | Spray and wipe surfaces. |
| Baking Soda Paste | 1 cup baking soda, water | Apply paste to tough stains. |
| Dish Soap Mix | 2 drops dish soap, 1 cup water | Use for general cleaning. |
These solutions are easy to make. They are safe for your family and the environment. Gather these supplies to get started on a cleaner bathroom fan.

Credit: megeletto.wordpress.com
Step-by-step Cleaning Guide
Cleaning your bathroom fan can improve its performance. A clean fan reduces dust and improves air quality. Follow these simple steps for effective cleaning.
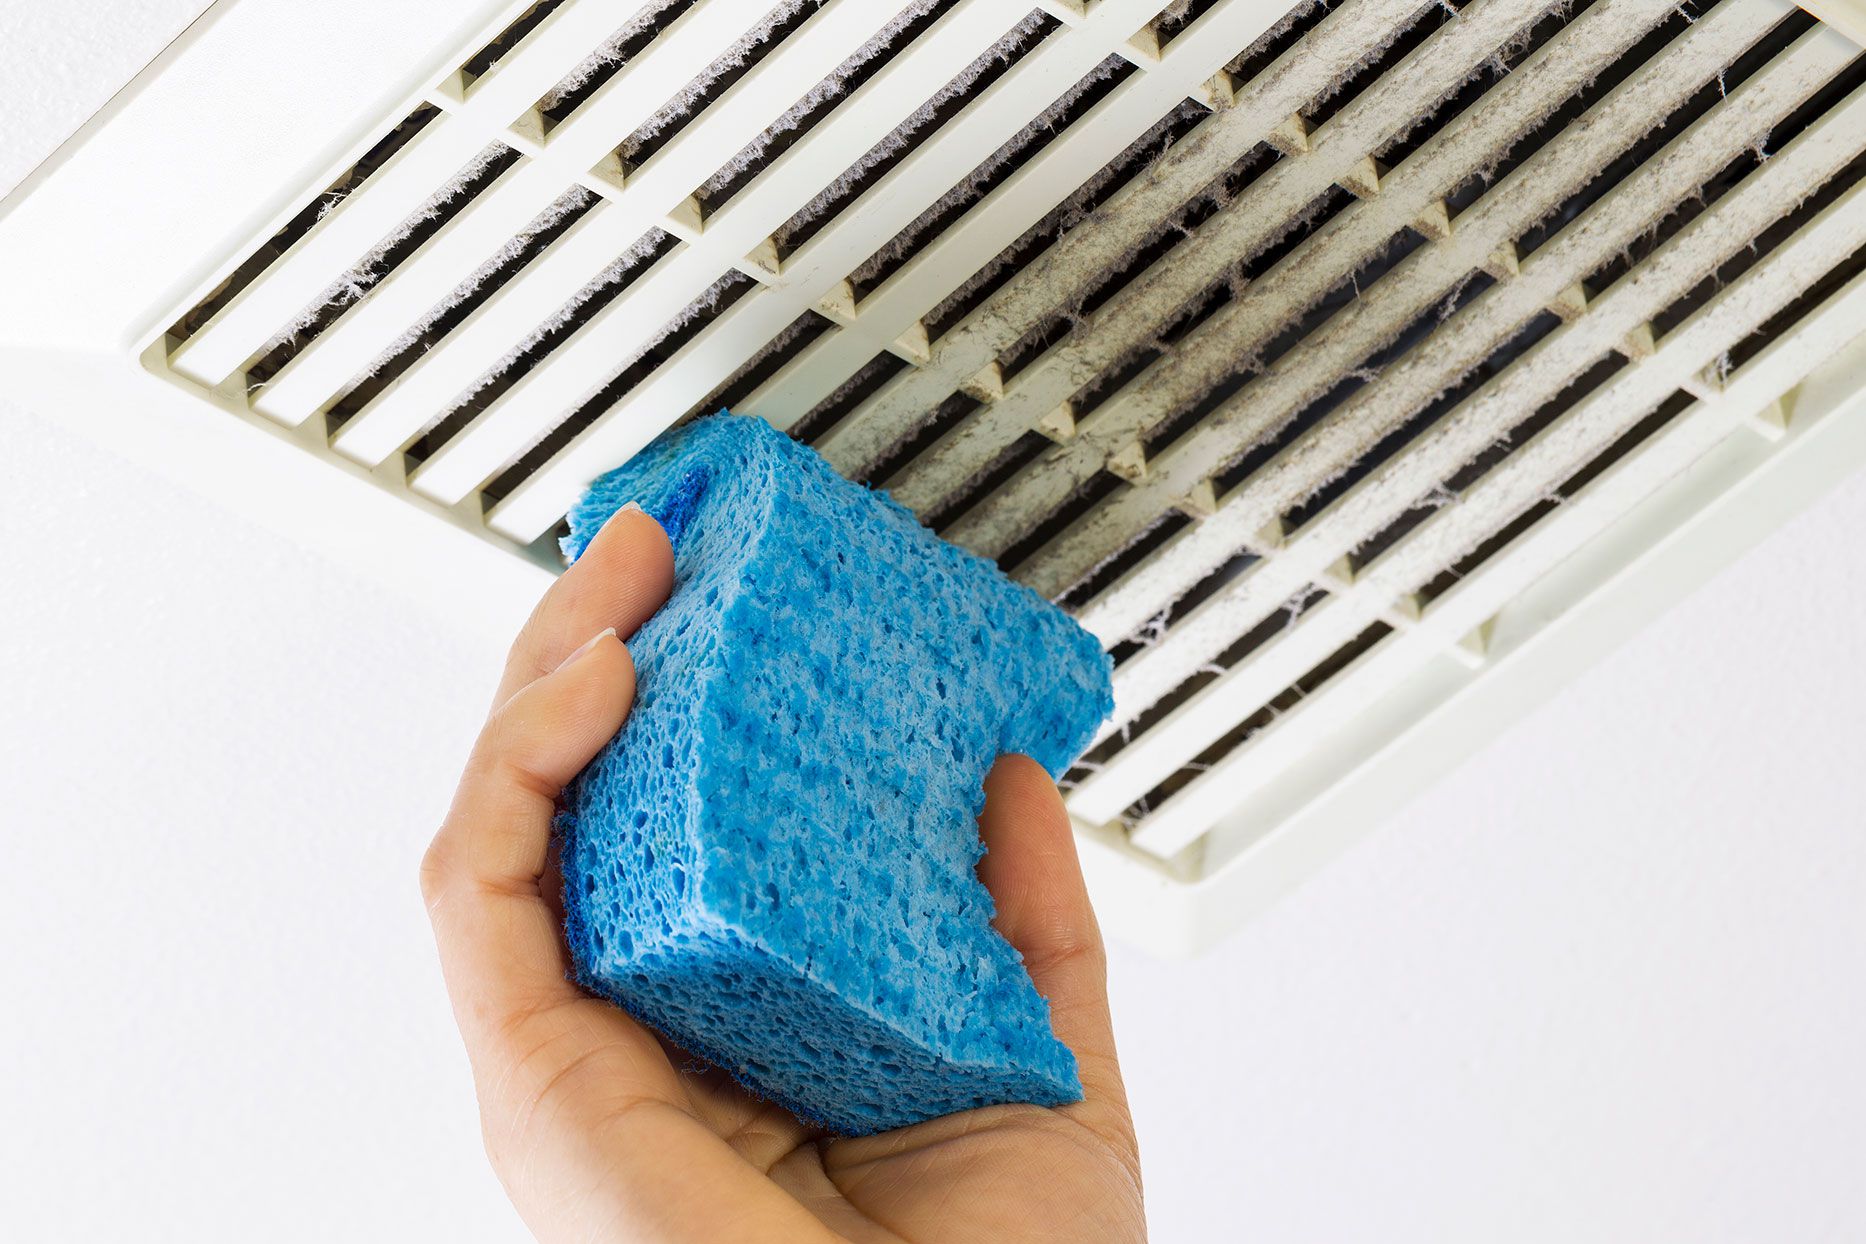
Removing The Cover
Start by turning off the power to the fan. Safety is important. Use a screwdriver to remove the fan cover. Here’s how:
- Locate the screws holding the cover.
- Unscrew them carefully.
- Gently pull the cover down.
Set the cover aside in a safe place.
Dusting And Vacuuming
Once the cover is off, dust will be everywhere. Use a microfiber cloth to remove loose dust. Follow these steps:
- Use a vacuum with a brush attachment.
- Vacuum around the fan blades.
- Dust any accessible areas.
This step helps prevent dust from spreading. A clean fan works better.
Deep Cleaning The Blades
Fan blades can collect grime over time. Deep cleaning is crucial. Here’s how to do it:
- Mix warm water and mild detergent.
- Soak a cloth in the solution.
- Wipe each blade thoroughly.
Make sure to dry the blades with a clean cloth. This prevents moisture buildup.
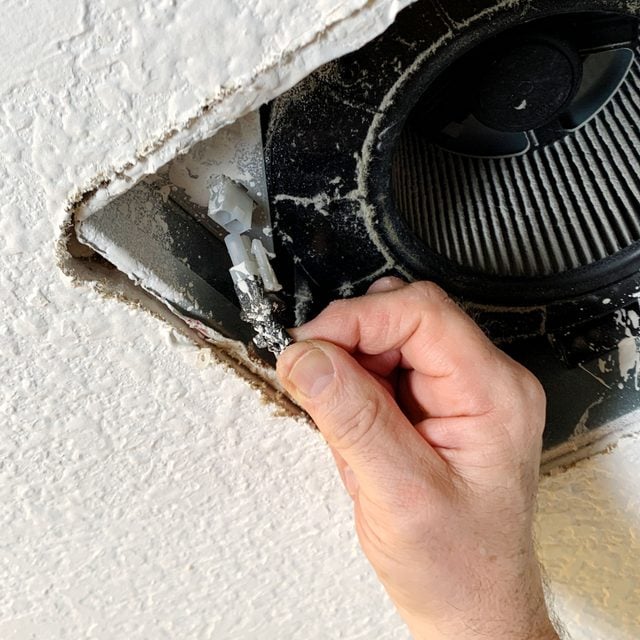
Cleaning The Motor And Housing
The motor and housing also need attention. Dust can affect performance. Follow these steps:
- Use a soft brush to clear dust from the motor.
- Wipe the housing with a damp cloth.
- Ensure no water enters the motor.
Check for any signs of wear or damage. If found, consider replacing the fan.
After cleaning, reattach the cover. Turn the power back on. Enjoy a cleaner, more efficient bathroom fan!
Reassembling Your Bathroom Fan
After cleaning your bathroom fan, it’s time to put everything back together. Proper reassembly ensures your fan works effectively. Follow these steps to reassemble your fan safely and securely.
Putting The Parts Back Together
Gather all the parts you removed earlier. Start with the fan motor and housing. Follow these steps:
- Align the motor with the housing.
- Secure it using the screws you removed.
- Attach the fan blades carefully.
- Make sure the blades spin freely.
Next, attach the cover. Ensure it fits snugly to prevent dust entry. Use the screws to secure it in place.
Ensuring Everything Is Secure
Check all connections and screws. Loose parts can cause noise or damage. Here’s how to ensure everything is secure:
- Double-check all screws are tight.
- Inspect the wiring for any loose connections.
- Test the fan by turning on the power.
If the fan runs smoothly, you have successfully reassembled it. Enjoy a cleaner and quieter bathroom!
Preventive Maintenance Tips
Keeping your bathroom fan clean is essential for its efficiency. Regular maintenance prevents dust buildup and ensures smooth operation. Here are some practical tips to keep your fan in top shape.
Regular Cleaning Schedule
Create a cleaning schedule for your bathroom fan. Regular cleaning helps maintain airflow and performance. Aim for these intervals:
| Frequency | Task |
|---|---|
| Monthly | Dust the exterior and grill. |
| Every 3 Months | Remove and clean the fan blades. |
| Annually | Inspect the motor and wiring. |
Use a soft cloth or vacuum to remove dust. A clean fan runs better and lasts longer.
Inspecting For Potential Issues
Regular inspections help catch problems early. Look for these signs:
- Noisy operation: Unusual sounds can indicate wear.
- Weak airflow: Reduced airflow may signal blockage.
- Burning smell: This could mean electrical issues.
Check the wiring and connections for any loose parts. Replace damaged components immediately. Addressing issues early saves money and time.
With these preventive maintenance tips, keep your bathroom fan running smoothly.
Troubleshooting Common Issues
Bathroom fans can have issues that affect performance. Identifying these problems helps restore functionality. Here are two common issues you might face.
Dealing With Persistent Noises
Noisy bathroom fans can be annoying. Here are steps to address the noise:
- Check for Loose Parts: Tighten screws and components.
- Inspect the Blades: Clean dirt and debris off the blades.
- Lubricate the Motor: Use a few drops of oil on the motor.
After these steps, test the fan again. If noise continues, consider replacing the fan.
Addressing Efficiency Problems
Low efficiency can reduce air circulation. Follow these tips to improve performance:
- Clean the Grille: Remove dust and grime from the grille.
- Check Ductwork: Ensure ducts are not blocked.
- Inspect the Motor: A malfunctioning motor can decrease airflow.
Use a vacuum to clear dust. A clean fan works better and lasts longer.

Credit: www.onegoodthingbyjillee.com
Conclusion: The Benefits Of A Clean Bathroom Fan
Cleaning your bathroom fan offers many benefits. A clean fan helps maintain a healthy environment. It improves air quality and extends the fan’s lifespan. Let’s explore these advantages in detail.
Improved Air Quality
Dust and moisture can gather in your bathroom fan. This buildup can lead to poor air quality. Regular cleaning helps prevent this issue.
- Reduces allergens in the air.
- Minimizes musty odors.
- Promotes better ventilation.
Good air quality is essential for health. A clean fan helps you breathe easier. Enjoy a fresher bathroom environment with a clean fan.
Extended Fan Lifespan
Cleaning your fan can prolong its life. Dust and grime can cause wear and tear. Regular maintenance keeps the fan running smoothly.
- Prevent motor strain from dirt.
- Avoid the need for frequent replacements.
- Save money on repairs and new fans.
A well-maintained fan works efficiently. This helps avoid costly issues down the road. Keep your fan clean for lasting performance.
Frequently Asked Questions
How Do You Clean A Dirty Bathroom Fan?
To clean a dirty bathroom fan, first turn off the power. Remove the cover and wash it with soapy water. Use a vacuum or brush to remove dust from the fan blades. Wipe all surfaces with a damp cloth before reassembling.
Restore power and ensure it functions properly.
Do Bathroom Exhaust Fans Need To Be Cleaned?
Yes, bathroom exhaust fans need regular cleaning. Dust and grime can accumulate, reducing efficiency. Clean the fan every few months to maintain optimal airflow and prevent mold buildup. A clean fan improves air quality and prolongs its lifespan. Regular maintenance ensures effective moisture removal from your bathroom.
How Do You Remove And Clean A Bathroom Fan Cover?
To remove a bathroom fan cover, turn off the power first. Use a screwdriver to unscrew the cover. Gently pull it down. Clean with a damp cloth and mild detergent. Rinse and dry thoroughly before reattaching. Secure the cover and restore power for safe operation.
Can A Bathroom Exhaust Fan Get Clogged?
Yes, a bathroom exhaust fan can get clogged. Dust, lint, and moisture can accumulate in the fan and ducts. Regular cleaning and maintenance help prevent clogs. Ensure proper airflow by checking the fan periodically for any blockages. Keeping it clean enhances efficiency and prolongs its lifespan.
Conclusion
Keeping your bathroom fan clean is essential for maintaining good air quality. Regular cleaning prevents dust buildup and improves efficiency. A well-maintained fan reduces odors and moisture, enhancing your bathroom experience. Follow the steps outlined in this guide to ensure your fan runs smoothly and lasts longer.
Your home deserves it!