
To install a bathroom vent fan, first turn off the power at the circuit breaker. Next, cut a hole in the ceiling and secure the fan unit.
Proper ventilation in a bathroom is crucial for preventing mold growth and maintaining air quality. Installing a bathroom vent fan can significantly improve moisture control and air circulation. This task may seem daunting, but with the right tools and guidance, homeowners can tackle it themselves.
A well-ventilated bathroom not only enhances comfort but also protects your home from potential damage. Knowing how to install a vent fan will empower you to create a healthier environment. This guide provides step-by-step instructions to help you complete the installation efficiently and safely. Let’s get started on transforming your bathroom!
Credit: m.youtube.com
Introduction To Bathroom Vent Fans
A bathroom vent fan is essential for any home. It helps remove moisture and odors. Proper ventilation keeps your bathroom fresh and dry. This prevents mold and mildew growth. Installing a vent fan can improve air quality. Let’s explore its importance and types.
Importance Of Proper Ventilation
Proper ventilation in your bathroom offers many benefits:
- Reduces Humidity: It removes excess moisture.
- Prevents Mold: A dry environment stops mold growth.
- Improves Air Quality: Removes unpleasant odors and pollutants.
- Enhances Comfort: Keeps the bathroom pleasant to use.
Without good ventilation, your bathroom can become a breeding ground for bacteria. This can lead to health issues. A vent fan is an easy solution to these problems.
Types Of Vent Fans
Choosing the right vent fan is vital. Here are the main types:
| Type | Features | Best For |
|---|---|---|
| Standard Fan | Basic functionality, affordable | Small to medium bathrooms |
| Exhaust Fan | Removes moisture effectively | High humidity areas |
| Heat Fan | Provides warmth and ventilation | Cold climates |
| Whisper-Quiet Fan | Low noise operation | Noise-sensitive homes |
Selecting the right fan depends on your bathroom’s size and humidity levels. Consider your needs before making a choice.
/how-to-install-a-bathroom-exhaust-fan-4147975-07-6bc075b510be4412845c4704ad185682.jpg)
Credit: www.thespruce.com
Tools And Materials Needed
Installing a bathroom vent fan requires specific tools and materials. Gathering the right items makes the job easier and faster. Below are the essential tools and materials you’ll need.
List Of Tools
- Drill – For making holes.
- Screwdriver – For installing screws.
- Wire Stripper – To prepare electrical wires.
- Tape Measure – For accurate measurements.
- Level – To ensure the fan is straight.
- Utility Knife – For cutting drywall.
- Pliers – To hold and twist wires.
- Safety Goggles – To protect your eyes.
- Dust Mask – To avoid inhaling dust.
Selecting The Right Vent Fan
Choosing the right vent fan is crucial for effective ventilation. Consider the following factors:
| Factor | Description |
|---|---|
| CFM Rating | Measure of airflow. Higher CFM means more air moved. |
| Noise Level | Look for fans with low sone ratings for quiet operation. |
| Size | Choose a fan that fits your bathroom’s size. |
| Style | Pick a design that matches your bathroom decor. |
| Energy Efficiency | Opt for models with energy-saving features. |
Selecting the right fan ensures proper airflow and energy savings. Make a decision based on your bathroom needs and preferences.
Pre-installation Preparations
Installing a bathroom vent fan requires careful planning. Proper preparations ensure a smooth installation process. Follow these steps to get started.
Safety Precautions
- Turn off the power to the bathroom.
- Use safety goggles to protect your eyes.
- Wear gloves to avoid cuts.
- Ensure proper ventilation in the work area.
- Keep a first aid kit nearby for emergencies.
Measuring And Marking
Accurate measurements are crucial. Here’s how to measure and mark properly:
- Decide on the fan location. Choose a spot near the shower or tub.
- Use a stud finder to locate ceiling joists.
- Measure the fan’s dimensions. Check the installation guide.
- Mark the outline of the fan on the ceiling.
- Double-check measurements before cutting.
Use the following table to track your measurements:
| Measurement | Notes |
|---|---|
| Fan Width | Check fan specifications |
| Fan Length | Ensure it fits the space |
| Distance from Walls | Maintain at least 12 inches |
Following these steps will prepare you for installation. Keep your workspace organized and efficient.
Step-by-step Installation Guide
Installing a bathroom vent fan can improve air quality. Follow these steps for a smooth installation. Each section below covers essential tasks.
Cutting The Vent Hole
Start by marking the vent hole location. Use a stud finder to avoid beams. Follow these steps:
- Choose a spot near the ceiling.
- Mark a circle for the vent size.
- Drill a pilot hole in the center.
- Use a drywall saw to cut the hole.
Ensure the hole is clean and smooth.
Wiring The Fan
Next, prepare for the electrical connection. Safety is crucial. Follow these instructions:
- Turn off the power at the circuit breaker.
- Remove the fan cover.
- Connect the wires:
| Wire Color | Connection |
|---|---|
| Black | Connect to the fan’s black wire. |
| White | Connect to the fan’s white wire. |
| Green or bare | Connect to the ground screw. |
Secure all connections with wire nuts. Replace the fan cover.
Attaching The Vent Fan
Now, install the vent fan into the hole. Follow these steps:
- Align the fan with the vent hole.
- Insert screws into the mounting brackets.
- Tighten the screws securely.
Make sure the fan is flush against the ceiling.
Securing The Duct Connection
Finally, connect the duct to the fan. Proper connections ensure efficient airflow. Do the following:
- Attach the duct to the fan outlet.
- Use duct tape to seal the connection.
- Run the duct to the exterior vent.
Check all connections for tightness. Restore power at the circuit breaker.
Test the fan to ensure it runs smoothly.
Finishing Touches
After installing your bathroom vent fan, focus on the finishing touches. These final steps ensure your fan works well and looks great.
Applying Caulk
Sealing gaps around the fan is essential. Use caulk to prevent moisture and air leaks. Follow these steps:
- Choose a silicone caulk for a strong seal.
- Apply caulk around the fan’s edges. Ensure it’s even.
- Use a caulking tool or your finger to smooth it out.
- Allow the caulk to dry completely.
Caulking improves energy efficiency and protects against mold.
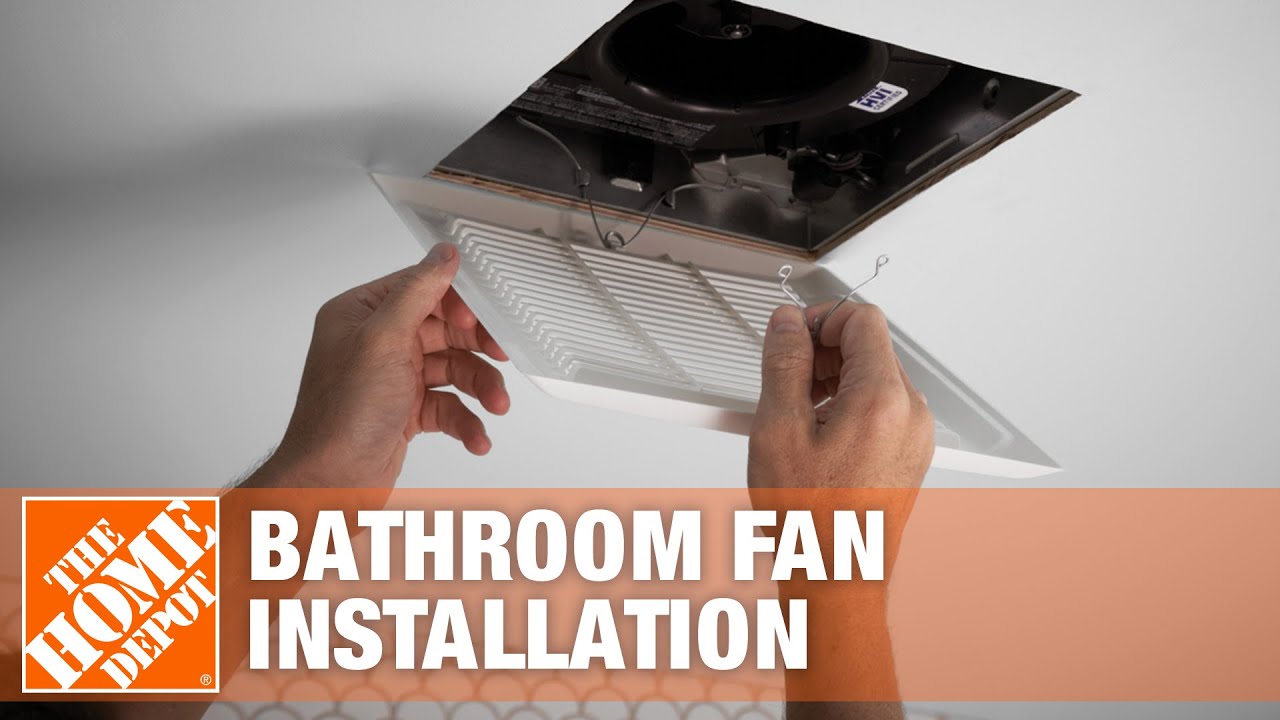
Installing The Grille
The grille gives your bathroom vent fan a polished look. Follow these steps:
- Align the grille with the fan unit.
- Push the grille firmly into place.
- Secure it using screws if needed.
Check the fit. A snug grille prevents dust and debris from entering. Your bathroom will look neat and professional.
Testing The Vent Fan
Testing your new bathroom vent fan is crucial. It ensures proper installation and functionality. Follow these steps for a thorough check.
Safety Checks
- Turn off the power at the circuit breaker.
- Use a voltage tester to ensure no electricity is flowing.
- Inspect wiring for any loose connections.
- Check for any signs of damage on the fan and ductwork.
Safety should always come first. Make sure to wear protective gear. This includes gloves and safety goggles.
Functional Test
After safety checks, it’s time for the functional test. Follow these steps:
- Restore power to the circuit breaker.
- Turn on the vent fan using the switch.
- Listen for any unusual noises, such as rattling.
- Check airflow by holding a piece of tissue near the vent.
The tissue should be drawn towards the vent. If it doesn’t move, the fan may not be working.
| Test | Expected Result |
|---|---|
| Power On | Fan operates smoothly. |
| Noise Check | No rattling or grinding sounds. |
| Airflow Test | Tissue gets pulled toward the vent. |
If any test fails, check the installation. Make necessary adjustments before using the fan regularly.
Maintenance Tips
Proper maintenance of your bathroom vent fan ensures it runs efficiently. Regular care prevents dust buildup and extends the fan’s lifespan. Here are essential tips for keeping your vent fan in top shape.
Routine Cleaning
Cleaning your bathroom vent fan is simple. Follow these steps:
- Turn off the power.
- Remove the cover using a screwdriver.
- Wash the cover in warm, soapy water.
- Wipe the fan blades with a damp cloth.
- Reattach the cover and restore power.
Do this every few months. Regular cleaning keeps the fan efficient.
Troubleshooting Common Issues
Sometimes, your bathroom vent fan may face issues. Check these common problems:
| Issue | Solution |
|---|---|
| Fan not running | Check the power source. Replace the fuse if needed. |
| Unusual noise | Inspect for loose parts. Tighten or replace as needed. |
| Insufficient airflow | Clean the fan and ductwork. Remove any blockages. |
Addressing these issues promptly helps maintain efficiency.
Benefits Of Installing A Bathroom Vent Fan
A bathroom vent fan is essential for every home. It improves air quality, prevents mold, and enhances comfort. Here are the main benefits of installing one.
Improved Air Quality
Good air quality is crucial for your health. A bathroom vent fan helps remove:
- Moisture
- Odors
- Allergens
By venting out stale air, it allows fresh air to circulate. This reduces pollutants and keeps the bathroom smelling fresh.
Mold And Mildew Prevention
Mold and mildew thrive in damp areas. A bathroom vent fan reduces humidity levels. This helps:
- Prevent mold growth
- Protect your walls and fixtures
- Lower health risks
Installing a vent fan can save on costly repairs. It ensures a safer and cleaner environment.

Credit: m.youtube.com
Frequently Asked Questions
Can I Install A Bathroom Exhaust Fan Myself?
Yes, you can install a bathroom exhaust fan yourself. Ensure you have the right tools and follow the manufacturer’s instructions. Familiarize yourself with electrical and ventilation codes for safety. This DIY project can improve air quality and reduce moisture effectively.
Always prioritize safety while working.
Do Bathroom Exhaust Fans Need To Be Vented Outside?
Yes, bathroom exhaust fans need to be vented outside. Venting prevents moisture buildup, which can lead to mold and damage. Proper ventilation improves air quality and keeps your bathroom dry. Always ensure the fan’s duct directs air outside for optimal performance.
What Is The Proper Venting For A Bathroom Fan?
Proper venting for a bathroom fan requires ducting to the outside. Use rigid or semi-rigid ducting for optimal airflow. Ensure the duct length is minimized and avoid sharp bends. Install a vent cap to prevent backdrafts and moisture entry. Regularly check for blockages to maintain efficiency.
Can You Install A Bathroom Exhaust Fan Without Duct?
Yes, you can install a bathroom exhaust fan without ducting. These fans vent air directly into the room or through an exterior wall. Choose a fan designed for this purpose to ensure proper ventilation and moisture control. Always follow local building codes for installation.
Conclusion
Installing a bathroom vent fan can greatly improve air quality and prevent moisture buildup. Following the right steps ensures a successful installation. Take your time and double-check all connections. With proper care, your new fan will enhance comfort in your bathroom for years to come.
Enjoy a fresher, healthier space today!