To tile a bathroom, start by preparing the surface and measuring the area. Next, apply adhesive and lay the tiles, ensuring even spacing.
Tiling a bathroom can transform your space and increase its value. This project requires careful planning and attention to detail. Begin by selecting the right tiles that match your style and budget. Proper surface preparation is essential for a long-lasting finish.
You’ll need tools such as a tile cutter, adhesive, and grout. Understanding the layout can help avoid mistakes and wasted materials. Whether you’re a DIY enthusiast or a seasoned pro, following a systematic approach will ensure success. With the right preparation and techniques, you can achieve a stunning tiled bathroom that enhances both functionality and aesthetics.

Credit: www.youtube.com
Introduction To Bathroom Tiling
Tiling a bathroom transforms the space beautifully. It adds style and functionality. A well-tiled bathroom is easier to clean. It also prevents water damage. This guide helps you start your tiling project.
Why Tiling Is A Great Diy Project
Tiling offers many benefits for DIY enthusiasts. Here are some reasons to tile your bathroom:
- Cost-Effective: Save money on labor costs.
- Personal Touch: Choose your favorite colors and patterns.
- Skill Development: Learn a valuable DIY skill.
- Instant Upgrade: Instantly improve your bathroom’s look.
Many homeowners enjoy the satisfaction of completing a project. With the right tools and guidance, anyone can tile a bathroom.
Before You Begin: Preparation Tips
Preparation is key for successful tiling. Follow these steps:
- Gather Tools: You need tile, adhesive, grout, and a trowel.
- Choose Your Tiles: Pick tiles that suit your style.
- Measure the Area: Calculate the space you will tile.
- Prepare the Surface: Clean and level the surface before tiling.
- Plan Your Layout: Dry fit tiles to see how they will look.
Proper preparation ensures a smooth tiling process. Take your time and plan carefully.
Materials And Tools Needed
Choosing the right materials and tools is vital for tiling a bathroom. Proper preparation ensures a smooth installation process. This section covers essential items and tools you’ll need.
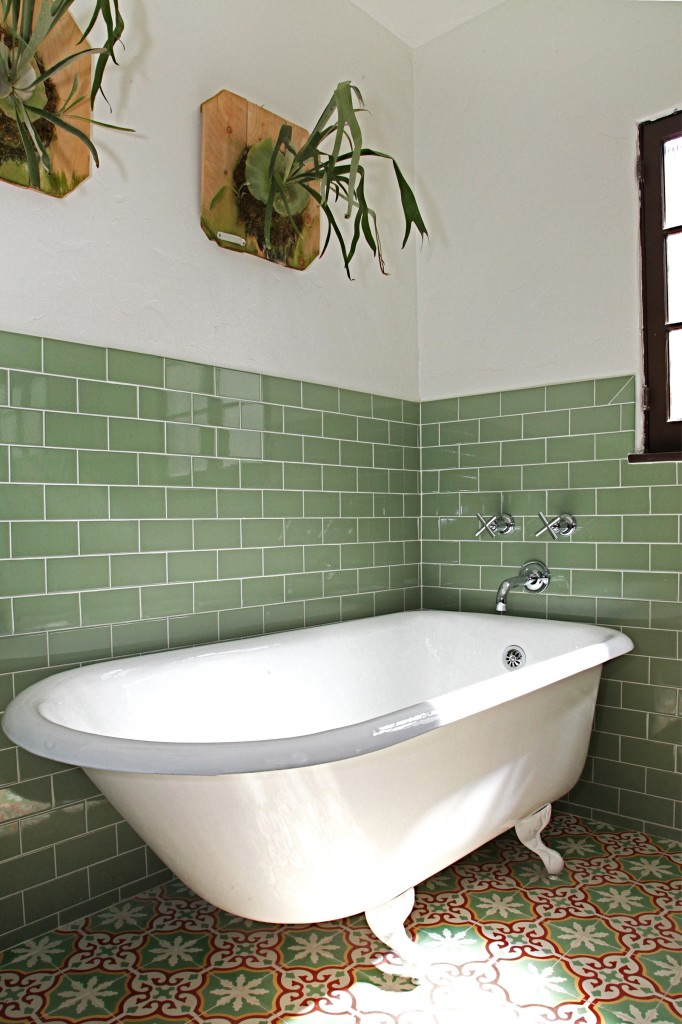
Choosing The Right Tiles
Selecting tiles is crucial for your bathroom’s look. Here are some popular options:
- Ceramic Tiles: Durable and water-resistant.
- Porrcelain Tiles: Strong and low-maintenance.
- Glass Tiles: Stylish but may require more care.
- Natural Stone: Unique and elegant but needs sealing.
Consider the size, color, and pattern. Smaller tiles offer more design flexibility. Larger tiles create a spacious feel. Always choose tiles that suit your bathroom style.
Essential Tiling Tools
Gather the following tools before starting:
| Tool | Purpose |
|---|---|
| Tile Cutter: | For cutting tiles to fit. |
| Trowel: | For spreading adhesive. |
| Level: | Ensures tiles are even. |
| Grout Float: | For applying grout. |
| Sponge: | For cleaning excess grout. |
These tools will make your tiling project easier. Invest in quality tools for better results.
Safety Gear
Safety is important during tiling. Use the following gear:
- Safety Glasses: Protect your eyes from debris.
- Gloves: Keep your hands safe from sharp edges.
- Mask: Avoid inhaling dust or fumes.
- Knee Pads: Protect your knees during installation.
Wear safety gear at all times. It helps prevent accidents and injuries.
Planning Your Tile Layout
Planning your tile layout is essential for a stunning bathroom. A well-thought-out design enhances beauty and functionality. Start with careful measurements and explore various tile patterns.
Measuring Your Space
Accurate measurements are crucial before tiling. Follow these steps for precise results:
- Measure the length and width of your bathroom.
- Calculate the total area by multiplying length by width.
- Account for fixtures like sinks and toilets.
- Consider the tile size you wish to use.
Here’s a quick guide to understand tile sizes:
| Tile Size | Area Covered (per tile in sq ft) |
|---|---|
| 12×12 inches | 1 |
| 6×6 inches | 0.25 |
| 3×6 inches | 0.125 |
Ensure you have an extra 10-15% of tiles for mistakes and cuts.
Tile Patterns And Designs
Selecting the right tile pattern enhances your bathroom’s look. Consider these popular patterns:
- Straight Lay: Simple and classic.
- Diagonal Lay: Creates a dynamic effect.
- Herringbone: Offers a unique design.
- Basketweave: Adds texture and depth.
Choose colors that match your bathroom theme. Light colors make the space feel larger. Dark colors add warmth and coziness.
Use samples to visualize how tiles work together. Lay them out on the floor before installation. This will help you see the overall effect.
Preparing The Bathroom
Preparing the bathroom is vital for a successful tiling project. Proper preparation ensures your tiles adhere well and last longer. Follow these steps to get your bathroom ready for tiling.
Cleaning And Surface Preparation
Start with a clean surface. Remove all items from the bathroom. This includes:
- Toiletries
- Towels
- Bathroom mats
- Furniture
Next, clean the surfaces thoroughly. Use a strong cleaner to remove dirt and grime.
Check for any mold or mildew. Treat these areas with a mold remover. Allow the area to dry completely.
Inspect the walls and floor for damage. Look for:
- Cracks
- Loose tiles
- Peeling paint
Repair any damage before proceeding. Fill cracks with a suitable filler. Sand the area smooth for better adhesion.
Applying A Waterproof Barrier
A waterproof barrier is essential in bathrooms. It protects against moisture damage. Follow these steps to apply it:
- Choose a waterproof membrane. Options include:
- Liquid membranes
- Sheet membranes
- Apply the membrane to walls and floors. Use a paint roller or brush.
- Ensure complete coverage. Pay attention to corners and seams.
- Allow the membrane to dry as per the manufacturer’s instructions.
Inspect the barrier for any missed spots. A good waterproof barrier prevents leaks and mold growth.
Installing The Tiles
Installing tiles in your bathroom can transform its look. This process involves several key steps. Each step requires attention to detail for a flawless finish.
Mixing And Applying Adhesive
Proper adhesive is essential for a strong tile bond. Follow these steps:
- Choose the right adhesive for your tiles.
- Mix the adhesive according to the manufacturer’s instructions.
- Use a notched trowel to apply the adhesive.
Apply the adhesive evenly on the wall or floor. Use the notched side of the trowel for better grip. Make sure to cover a small area at a time. This prevents the adhesive from drying out.
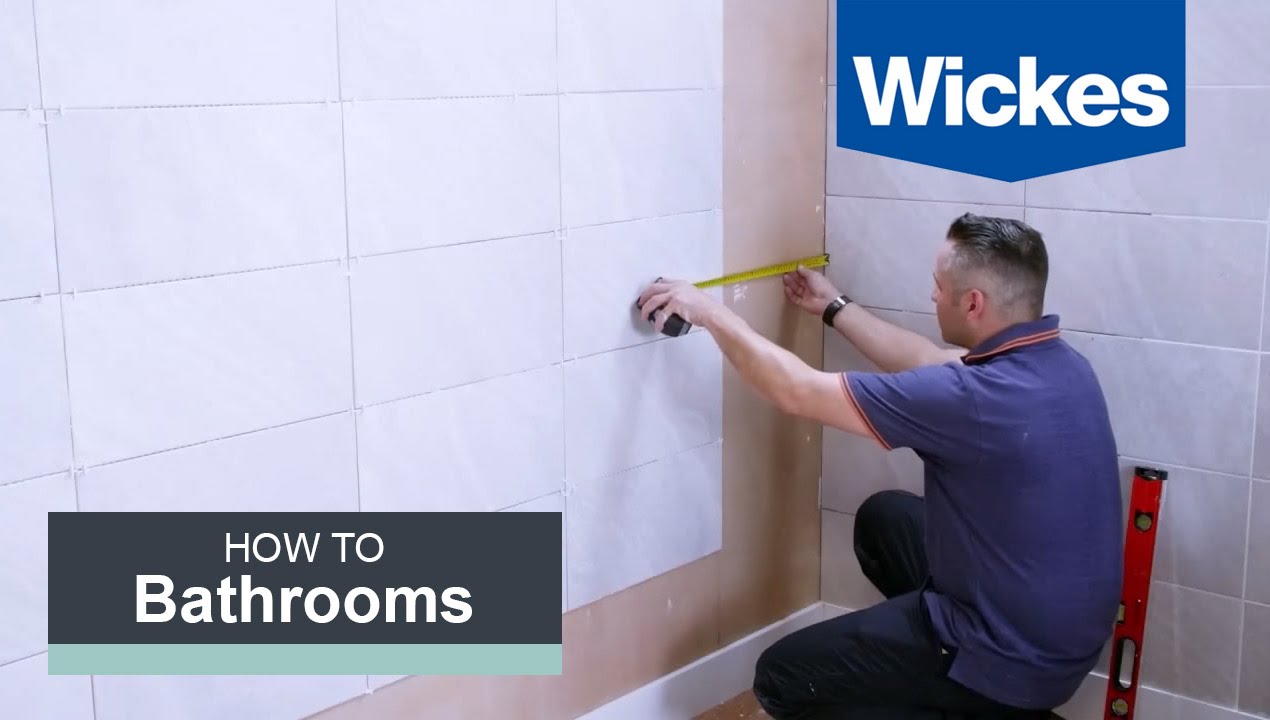
Laying Tiles Accurately
Accurate tile placement is crucial for a professional look. Follow these tips:
- Start at the center of the wall or floor.
- Press each tile firmly into the adhesive.
- Use spacers to maintain even gaps between tiles.
Check for level as you go. Adjust tiles as needed before the adhesive sets. This ensures a straight and even layout.
Cutting Tiles To Fit
Cutting tiles may seem daunting. Use the right tools for best results:
| Tool | Use |
|---|---|
| Tile Cutter | For straight cuts |
| Wet Saw | For intricate cuts |
| Tile Nipper | For small adjustments |
Measure the space carefully before cutting. Always wear safety glasses. Take your time to ensure a precise fit.
Grouting And Sealing
Grouting and sealing are vital steps in tiling a bathroom. They protect your tiles and enhance their beauty. Proper application ensures durability and easy maintenance.
Choosing The Right Grout
Selecting the correct grout is essential for your bathroom. Different types serve various purposes. Here’s a quick overview:
| Type of Grout | Best For | Key Features |
|---|---|---|
| Cement-Based Grout | General tile installations | Affordable, strong, but porous |
| Epoxy Grout | Wet areas like showers | Water-resistant, durable, stain-proof |
| Unsanded Grout | Narrow joints | Good for delicate tiles |
| Sand Grout | Wide joints | Prevents shrinkage, adds strength |
Applying Grout Properly
Applying grout requires careful attention. Follow these steps for best results:
- Prepare the area: Ensure tiles are clean and dry.
- Mix the grout: Follow manufacturer instructions.
- Use a float: Spread grout diagonally across the joints.
- Remove excess: Wipe off with a damp sponge.
- Let it cure: Allow grout to set for the recommended time.
Sealing The Tiles
Sealing protects tiles and grout from moisture and stains. Here’s how to do it:
- Choose a quality sealant: Look for waterproof options.
- Clean the surface: Remove any dust or debris.
- Apply the sealant: Use a brush or roller for even coverage.
- Follow drying times: Check the product for specifics.
Sealing your tiles enhances their lifespan. Regular maintenance keeps them looking new.
Finishing Touches
After laying the tiles, focus on the finishing touches. These details make your bathroom look polished and professional. A clean and neat finish enhances the overall appearance.
Cleaning Up
Start by cleaning the tiled area. Remove any excess adhesive or grout.
- Use a damp sponge for grout cleanup.
- Wipe tiles with a soft cloth.
- Check for any leftover debris.
Ensure everything is spotless. A clean space highlights your hard work.
Caulking Edges And Corners
Caulk edges and corners for a neat finish. This step prevents water damage and adds a professional look.
- Choose a high-quality caulk suitable for bathrooms.
- Apply caulk in a steady, even line.
- Use a caulk smoothing tool for a clean edge.
- Wipe away any excess caulk promptly.
Let the caulk dry completely. It will seal the gaps and protect your tiles.

Credit: www.simplythenest.com
Maintenance And Care
Maintaining your tiled bathroom keeps it looking fresh and new. Regular care prevents damage and extends tile life. Simple cleaning methods ensure your tiles shine. Quick repairs can save you time and money.
Routine Cleaning Tips
Regular cleaning keeps your tiles free from dirt and grime. Follow these easy steps:
- Daily Wipe: Use a damp cloth to wipe surfaces.
- Weekly Clean: Use a mild detergent and warm water.
- Monthly Deep Clean: Apply a tile cleaner to remove stains.
For best results, follow these tips:
- Use a soft brush for grout lines.
- Avoid harsh chemicals that can harm tiles.
- Rinse thoroughly after cleaning.
Keep tiles dry to prevent mold and mildew. Ventilation helps too. Open windows or use an exhaust fan.
Repairing Damaged Tiles
Tiles can chip or crack over time. Quick repairs help maintain a good look. Follow these steps for easy fixes:
- Identify Damage: Check for cracks or loose tiles.
- Gather Supplies: Get tile adhesive, grout, and a putty knife.
- Apply Adhesive: Use a putty knife to spread adhesive.
- Press Tile: Firmly press the tile into place.
- Fill Grout: Use a grout float to fill gaps.
- Clean Excess: Wipe off any extra grout.
Allow everything to dry completely. Regrouting may be necessary for larger areas. This keeps your bathroom looking fresh.
| Repair Task | Time Needed | Materials |
|---|---|---|
| Identify Damage | 5 minutes | N/A |
| Gather Supplies | 10 minutes | Tile adhesive, grout, putty knife |
| Apply Adhesive | 10 minutes | Tile adhesive |
| Press Tile | 5 minutes | N/A |
| Fill Grout | 10 minutes | Grout |
| Clean Excess | 5 minutes | Cloth |
Credit: www.granadatile.com
Frequently Asked Questions
When Tiling A Bathroom, Where Do You Start?
Start tiling a bathroom from the center of the room. This ensures even cuts at the edges. Use a chalk line for guidance. Begin with the floor, then move to the walls. Prioritize areas like the shower or bathtub for a clean finish.
What Is The 3 4 5 Rule For Laying Tile?
The 3-4-5 rule helps ensure square corners when laying tile. Measure three feet along one wall, four feet along the other, and check the diagonal distance. If it’s five feet, the corner is square. This technique enhances tile alignment and prevents uneven surfaces.
Is It Hard To Tile A Bathroom Yourself?
Tiling a bathroom can be challenging, especially for beginners. It requires precision, patience, and some DIY skills. Familiarity with tools and techniques is essential. Many find it rewarding, but be prepared for a time investment. Proper planning can make the process easier and more enjoyable.
How Do You Prepare A Bathroom For Tiling?
To prepare a bathroom for tiling, start by removing old tiles and cleaning the surface. Ensure the walls and floors are dry and level. Repair any damages, and apply a waterproof membrane if necessary. Gather your tools and materials before beginning the tiling process for efficiency.
Conclusion
Tiling a bathroom can transform your space beautifully. With proper planning and the right tools, anyone can achieve professional results. Remember to take your time and pay attention to detail. A well-tiled bathroom not only enhances aesthetics but also increases your home’s value.
Start your tiling project today and enjoy the results!